Sunday, June 9, 2013

The Joyner Houses Part 2


                            The American Small House


Pencil & Ink drawing done in Art Class in 1960


Building the Greenville House 1947


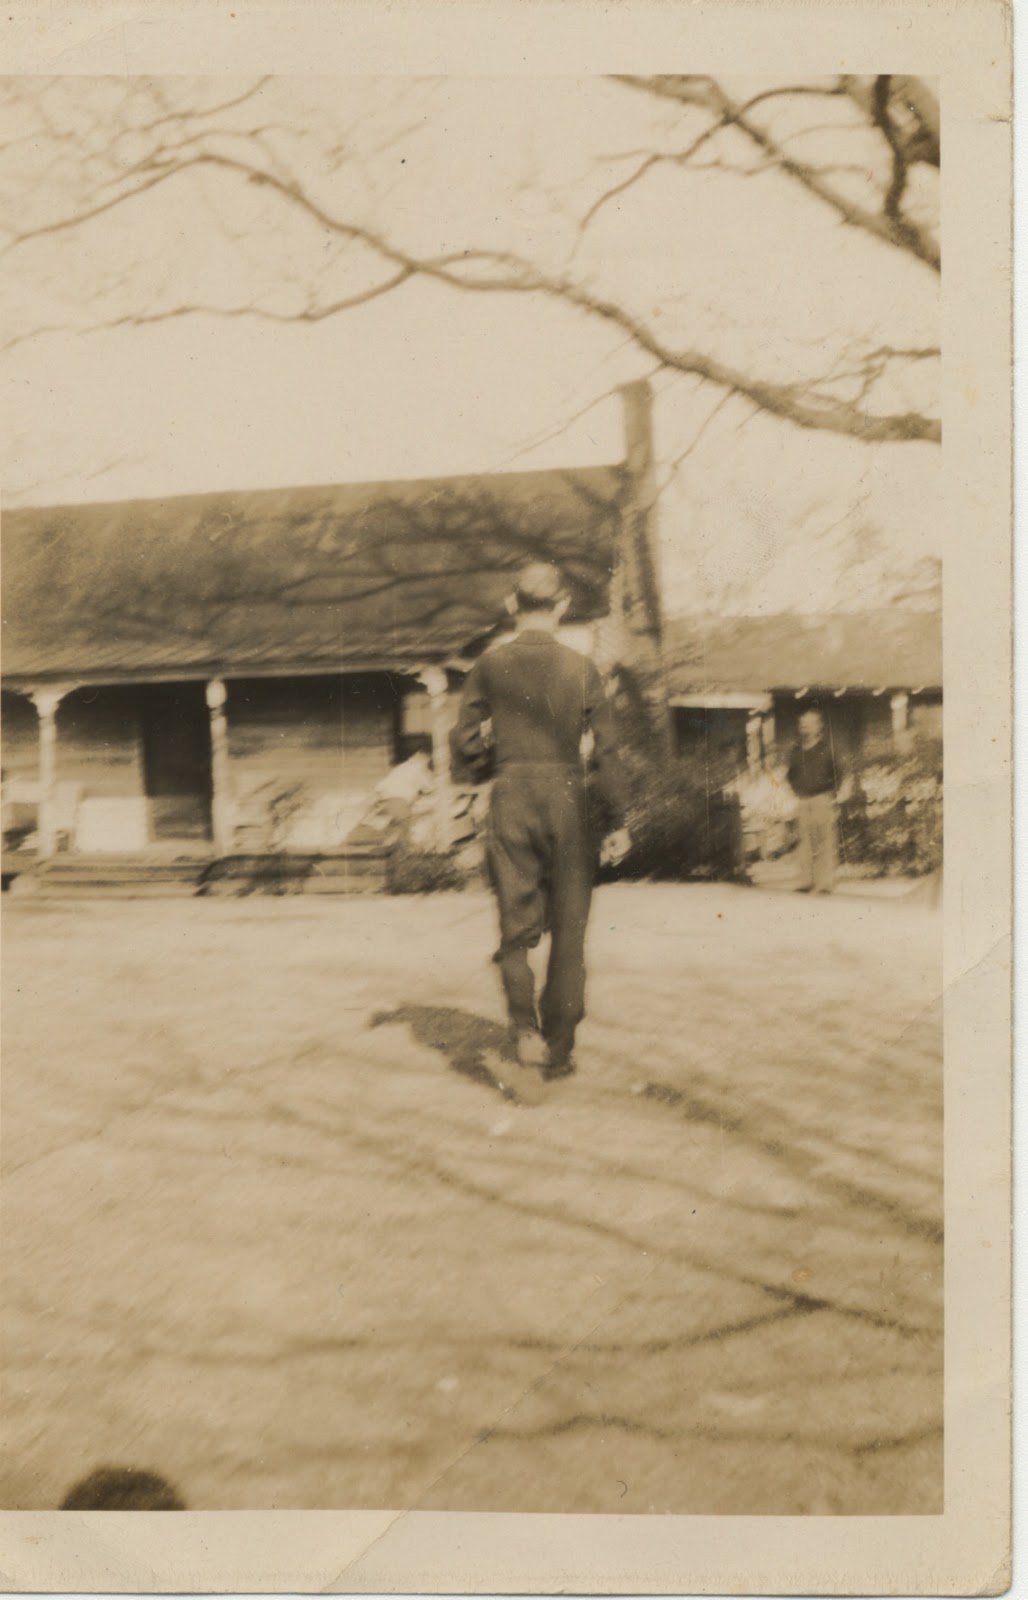
Back view of the house in 1947
Front view of the house in 1947


After months of researching, I finally found the "label" for the Greenville House. The style of architecture is called The American Small House.  It was built on Granddaddy's farm in a field  - in which sometimes corn, sometimes tobacco had been planted. This type of house is also described in A Field Guide to American Houses  as the Minimal Traditional.  


From 1942-1945, materials to build houses were diverted for WWII efforts.  There were limits and rationing and most people supported the program.  In 1945-1947, returning war servicemen and their families needed housing.  The FHA helped provide loans for building houses.  The veteran usually built a small house, about 1000 square feet, including ways to expand the house later.  Most of the houses were 2 bedroom/one bathroom houses, though some contained three bedrooms, and sometimes a basement. (www.small house living.org).  One resource said that there were no halls but the Greenville house had a central hallway and I know that several friends had houses with similar floor plans with central hallways. I found floor plans that had a central hallway.  Usually, the central hallway contained the dangerous oil heater or later, the floor furnace.

The American Small House was a term used to describe the houses the middle class veterans built after returning from World War II.  These houses, usually with FHA loans had to meet specifications of the FHA.  The construction of the house required standarized building materials, components, and construction techniques.  This type of house was used for building federally funded houses for projects such as the Norris Dam, the Tennessee Valley Authority hydroelectric project.  Most of the homes had hardwood floors.  Many of the houses were brick-veneered with wood-framed structures.  Load bearing brick walls were used because of the post-war lumber shortage.(www.phmc.state.pa.us)

While living in the Farmhouse, Mama and Daddy built this American Small 3 bedroom house across the highway from the farmhouse. The "Governa's" house was built just after World War II in the tobacco field on the Farmville Highway.  My family lived in this house for 17 years before moving.  During those 17 years, the house was the home of two parents and four children.  At times it was, also, the home of one of Daddy's brothers or sisters when problems arose and they needed a place to stay for awhile.  There was a times when we kept my older sister's child, giving my sister quiet time to study for exams.


Floor plan of Greenville house, maybe

The research of American Small Homes never produced the floor plan of the Greenville house.  My brother expained that Mama had the orginal floor plan changed to accommodate the small third bedroom and cellar.  A door was needed for the cellar.  I tried to draw out the plan from memory but it has been 50 years since I last saw the interior of the house. I know that there was a linen closet in the central hallway beside the bathroom but I'm not sure how to put it there because I thought the door to the closet was flush with the wall.  For those who know the house, please excuse any errors.   (I could use the feedback for corrections).   The floor plan was needed to explain several features of the house.  Notice bedroom three.  It was so small that it could hold a dresser and a single bed and maybe a little table.  I remember, as a child, that the room was always crowded.

Explaining the situation of not having the house plans, my brother told me that he had found the General Building Specifications in Daddy files when he was cleaning out house documents when settling Mama's estate.  He emailed the document to me.  As I was reading the document, the document stated "These specifications are for use with plans designed by Standard Homes Company.  That lead me to another afternoon of looking through computer vintage house plans for Standard Homes Company and bingo!  Found it.  Lane was correct in that the floor plan was changed to accommodate the third bedroom and cellar.  What was to be stairs to the attic were enlarged to make room for a bathroom and mudroom and the original bathroom was made into a bedroom.  Those accommodations pushed out part of the back of the house a few feet.  I was happy that my memory of the floor plan was almost correct.

Original House plans from the House Plans Booklet, Plan No 4


There was a closet at the front entry.  It was small, but near Chrismas, it always had Christmas presents locked in it.  I will never forget the Christmas that my brother found the key.  We ruined Christmas for ourselves. 

As an American Small House, there was only one bathroom.  That was not the orginal floor plan placement of the bathroom.  The small bedroom was the original bathroom. Yes, you note that there were two doors on the "moved" bathroom.  Mama had that second door constructed so that children, playing outside and wanting to use the bathroom, did not have to come in the mud room (and we did play in mud), through the kitchen, through dining room, in the hallway, and then enter the bathroom.  But, the second door did produce problems with privacy because we were not allowed to lock the doors.  (Doors in the house could only be locked with skeleton keys when I lived there and the children (or teens) were not privy to them). I would bet that the bathroom back door is no longer there.


When my younger sister was born in 1947, her bed was located in Mama & Daddy's bedroom.  There was a screen over the bed.  I remember it looked something like today's co-sleeper except that it had a screen hinged top.  That hinged top was used to protect my baby sister because my brother would pinch her to make her cry.  The rest of the children slept in bedroom 2, with two cribs and one twin bed.

When my brother and I began sleeping on twin "big beds", our younger sister's crib was moved into bedroom 2.  Our older sister was moved into bedroom 3.  Much later  there were three twin beds bedroom 2.  As older babies, I can remember a gate being on the door so that we couldn't get out.  The oil heater in the central hall was very dangerously hot.  We were not allowed in the hall without an adult guiding us through the hall.  One day, our mother was hanging clothes on the clothes line.  I do remember that my brother moved the oak dresser to the door by the gate, pulled the drawers out as a ladder and got out of the room.  I followed him and went and told my mother that my brother had gotten out of the room.  (I've always been known as "the tattler")

The central hallway was later used frequently because the oil heater was replaced with a floor furnace.  One could get burned on the floor grate if not careful and we learned to walk around it. (The furnace was just below the grate.)  I had several friends with grate burn scars on their butts or legs from falling on the grates in their house.  With the forced air from the furnace, the hallway was used to dry clothes on a clothes rack in the winter, drying hair by standing over the grate and letting the hot air dry the hair.  Daddy was always fussing at us to make sure nothing was put on the grate, whether it was winter or not.

Another danger in the house was the cellar.  It was located under the central hall.  The stairs to the cellar were located behind a door next to the inside wall of bedroom 3.  Coming from New Hampshire, most everyone had a cellar or basement in the house in which my mother had lived.  She thought all houses should have them -- so she insisted on have a cellar in the Greenville house.  Daddy, the builder, and relatives tried to convince her that they would hit the water table when digging the cellar.  She had her cellar but it was like a dark, dank pool under the house. At times,  Daddy got a sump pump and emptied the water.  He tried several times painting it with a sealer and thought he wasn't doing it right, so he hired someone to do it.  Nope, it filled with water.  Daddy wanted to seal it up but Mama wouldn't allow it.  So, the door to the cellar was always locked and we weren't allowed near the door, even as teens.  I guess we grew up insensitive to mold and mildew because that had to cause damage to the house.  (I believe now that it is filled (with soil or concrete) and I wonder if the stairs to the cellar are still there.)


Other rules -- for the outside.  Two maple trees were planted in the front yard.  One can be seen in the front view picture of the house.  We were not allowed to play in the front yard without supervision but even then there was a rule.  A rope was tied from maple tree to maple tree and one better not cross over that rope.  Those were the days of physical punishment and Mama used paddles -- you know the ones that had balls attached with a rubber band.  Hated when the balls fell off because the paddle then became the property of Mama.  I think our aunts and uncles gave us those paddles knowing that Mama might need one.

The rope to the maple trees was later removed.  It had to be removed so that the rope wouldn't grow into the tree.  I'm not sure when, but my brother said there was no rope when he began mowing the lawn.

Playing on the side porch
In the summer, playing outside was a must for Mama's sanity.  Many of our toys were in boxes on the side porch.  We even had a record player on the porch.  After breakfast, we were asked to play on the side porch.  It was cooler on the porch.  In two of the introduction pictures, you can see us playing on the side porch.  Notice, there were no side rails on the porch.  I don't remember any bad accidents from falling off the porch -- in fact, if we did fall off the porch, I don't remember it.  The porch wasn't very high from the ground.  We spent many, many hours playing on that porch.  I imagine that there are still juice stains, food stains, and watermelon stains on the concrete because we ate our lunch on the porch in the summer or on the picnic table in the back yard.  Then there was always a nap after lunch.  Bedroom 2 had a kitchen timer on the dresser.  If any of us got up before the timer went off, the timer was reset with added minutes.  I think it was believed that a nap or rest time was very important to prevent polio - no vaccine yet.

When we weren't playing on the porch, we played in the back yard, under the willow tree.  In the picture below, it is small.  It got rather large.  A picnic table was under it and we used the table for playing and having lunch there under the willow.  It was fun running through the limbs and leaves hanging down.  I remember my brother and younger sister playing "elevator" in the tree.  He went up the tree and threw a rope over a branch; he tied a paint bucket to the rope and they took turns being pulled up the tree by standing with one foot in the paint bucket.  Mama saw it out the window.  She ran outside and very calmly took the rope from my sister, and lowered by brother down. I don't remember what she said to us, but she took the paint bucket and rope back in the house.  I was not the tattler in that incident.

Also, noted in the pictured is the clothes line in the back yard.  There was no electric dryer in our house until the early sixties.  Everything was dried outdoors.  One night the clothes, including sheets, got left on the line.  It had been raining and they got hung out late.  The next morning, everything on the line was gone.  Clothes were never left again to dry overnight.  If any clothes were still wet or damp, they were hung on a huge drying rack in the central hallway.


As I got older, we all got lessons on how to hang clothes out on a line.  We were expected to help if we were home, especially in the summer.  Monday was washday.  If one did not hang them right, they came down and were hung again, the "correct" way.  When we got an electric dryer, it was remarkable.  It certainly changed the house keeping schedule.


As the Willow Grows
Daddy hated that willow tree and always wanted to cut it down.  It was a real pain for him because it grew in the septic system, including the tank.  He would have to dig to the system and get the roots out.  I can still see him in wadding boots, knee deep in poop.  One year, an electric storm split the trunk of the tree.  He was hoping for it to die, but of course it didn't.  It had plenty of water and fertilizer!


The washing machines in the 50's for us went from a hand cranked wringer washing machine to electric cranked.  As a child I remember both.  As children, we were told horror stories about women and children getting their hair or fingers caught in the rollers so if your hair was down, you were not allowed in the kitchen.  The machine was kept in the mud room, by the bathroom door and pulled out on washday.  When the clothes were washed, they were put threw the rollers and then put in the bathtub to rinse.  (That made the back door to the bathroom very convenient.)  Once rinsed, the clothes were hand rung and then, were run through the rollers again.)

Also, in that mud room  was an electric roller iron machine.  All the sheets, pillowcases, and flat pieces were ironed on the electric roller iron machine.  The machine had to be pulled away from the wall when in use and took up most of the space in the mud room.  No one could come in or go out the back door ( it was actually the right side door but we called it the back door) when the roller ironing machine was in use because of space and safety.  When I was about 12 years old, I was taught how to use it.  I was only allowed to do the bed linens.  And again, according to Mama, there was only one right way to iron them.

We thought the back steps was a wonderful place to hang out.  Our parents thought otherwise.  If you look carefully at the picture below, you see the wringer washing machine.  It had rollers on each leg and was moved to the kitchen sink so that it could be filled and emptied.  Mama was pretty stressed out on washday.  In a week, two adults and 4 children could produce many, many loads of dirty laundry.  It always took most of the day to get the job done.  Sometimes Mama hired someone to help her so it could be done in one day.  Later when Mama got an automatic washing machine, life changed.  The laundry didn't have to be done all in one day.


We didn't have air conditioning as long as we lived in that house.  (We moved to Belhaven in the summer of 1963).  In the pictures taken in the summer, you notice that the windows are open. Some windows are opened at the top and bottom.  Daddy believed that the hot air escaped at top and cool air came in the bottom.   I loved watching the air blow the curtains.  It was if the curtains were laughing and dancing. We had fans in several windows but they were only allowed to run in the hottest part of the day.  The fans were not allowed to blow in the house.  They were used to suck hot air out of the house and one had better not change that method.  I got caught doing it one time when I was about 12 years old and never touched the fan again!

When we became older, the planned expansion of the house occurred.  The addition of two large bedrooms was completed in the attic.  Regular sized windows had been constructed in 1946 in the attic, planning for expansion.  Because the floor plans for the stairs had been used a a bathroom, stairs into the attic were constructed in a closet in bedroom #1.  Bedroom #1 became a den because traffic would no longer allow it to be used as a bedroom.  There are no pictures of the upstairs bedrooms -- don't know why.  The entire attic was constructed in knotty pine tongue & grove lumber.  When selling the house, the two bedrooms upstairs could not be claimed as bedrooms because the rooms and stairs didn't meet building code.  The upstairs had never been heated and placement of the stairs going up couldn't reach the gables.  Even average height people had to bend their heads when reaching the top of the stairs.

Everyone in the house was excited to expand out of the crowded rooms.  We didn't seem to mind that the bedrooms up stairs had no heat. In the winter, since there was no heat upstairs except the small amount that rose,  Mama heated sock covered bricks and put them in our beds.  When we got in the bed, we put the bricks in the floor.  In the mornings, we dressed downstairs.  It was too cold upstairs.  In the summer, a huge window fan ventilated the upstairs.  All the girls had bedrooms upstairs, my brother took over the small bedroom downstairs and Bedroom 2 became our parent's bedroom. I don't remember how they worked out the closet space because their bedroom had only 1 closet. I think Mama used the closet in the den for some of her clothes.

In 1963, Daddy was transferred by Wachovia Bank to Belhaven.  We moved to Belhaven, NC in late June.  Daddy waited to move us at the end of the school year because my brother and I were graduating from Rose High School in Greenville.  In the picture below you will notice the concrete planters on the front stoop.  You will see those again in Belhaven.  Daddy didn't want them moved because they were so heavy but, he wanted Mama happy so they are on the front side walk in Belhaven.  When we sold the Belhaven house and settled Mama's estate, we left them with the Belhaven House (The Joyner Houses Part 3 to come).


The Greenville house was rented until Daddy died.  He wanted to sell it but Mama couldn't part with it.  He hated working on the house, though he was able to visit his family in Greenville when he went.  The house was sold in 2004 or 2005.  Mama took a loss on the house because it was not in good repair.  Very little maintance had been done to the house.  The first person to buy the house did some work on it and improved its looks, as seen below.  Can you find 5 changes to the front of the house?


When the house was sold again, further improvements were completed on the house and it looks entirely different.  I think one of the owners installed central heat/air , the cellar was filled in, and the staircase leading upstairs were changed to meet code.  Also, I think bedroom 3 was converted to a bathroom.  The red bricks were painted white. (Doesn't that increase the cost of upkeep of the house? Maybe there was a problem with the bricks?)

Land in front and behind the house is no longer forest land and farmland.  Where there were fields of corn across the highway, there is now a subdividion.  There are subdivisions, apartments and a nursing home behind the house.  The house is no longer "in the country" but note all the tall trees that were not there when the house was built.  It is 67 years old and evidently very livable.  The American Small House has "served Americans well for over 70 years, and will continue to do so for many years to come" as stated by Amber Rhea in The American Small House: Boundless Possibilities.

Latest Picture Taken by Google Maps

Monday, April 29, 2013

Hats in Honor of the Sandy Hook Victims part 2

Olivia Engel Hat without Lamb pin ribbing turn up
Olivia Engel Hat with Lamb pin attached


beading on ribbing when turned down
               
Lamb cross stitched on plastic canvas  with beads


This blog is a continuation of a former blog Hats in Honor of the Sandy Hook Victims.  Since that blog, I learned how to knit and crochet with beads.  The process is so much fun and adds another  dimension to knitting and crocheting.


There are several methods used to add beads to a knitting or crochet project.  A couple of methods use a crochet hook to add a bead to a stitch.  Small beads sometimes require the use of a metal wire.  There are excellent methods shown on You Tube.  One of the simpliest methods for adding a bead when knitting is shown by Lucy Neatby's method.  This method lets you add beads as you knit.  Another method requires that beads be strung on the yarn or string before knitting, usually called prestringing the beads.  Sandy shows how to prestring with thread to yarn, but there are also needles which can help thread the beads to the yarn.  Sometimes prestringing is better for certain projects but one has to know the number of beads needed for the project.  There is also the wire method for getting the bead on the yarn.  There are several other methods.  

I choose this hat pattern and color to honor Olivia Engel, age 6, because pink and purple were her favorite colors.  Her favorite stuffed animal was a lamb.  You can read about Olivia at a special site in her memory.  

For this hat I used pink yarn and purple knitted yarn #4 weight and a circular needle # 6.  If a smaller hat is needed, use a smaller knitting needle and #2 or #3 weighted yarn.  I used small pony beads to match the yarn.  I found the mini plastic pony beads at Walmart.

The directions for the hat are as follows:

Rows 1: With the pink yarn, cast on 80 stitches on knitting needle and knit first rowwith the pink or 1st colored yarn if not using pink. (right side)
Row 2 - 9:  Complete ribbing stitch, (knit 1, purl 1) for 1 1/2 inches.  As you complete the ribbing stitch, add a mini pony bead to a knit stitch in the 3rd row, 6 row, and 9th row, placing the beads on alternating rows.  (Or, you can put the beads anywhere you like.)
Row 10:  On next row, (wrong side) purl with 1st colored yarn.  
Row 11 - 14:  On next row, add purple yarn (or 2nd color) and knit alternating color 1 and 2 across. Both colored yarns will be carried across the row.  The color you are not using should be held loosely behind the color you are using. (Knit on right side and purl on wrong side.)  Complete 3 more rows, making sure to alternate colors every stitch. 
Row 15 - 18:  On next rows knit on right side and purl on wrong side using purple yarn (2nd color yarn).  Drop the pink yarn (1st yarn) and if you want, cut the pink (or 1st yarn) leaving a long tail 
Row 19:  Using purple (2nd color), knit across on the wrong side for 30 stitches, purl 20 stitches, knit 30 stitches  (This will make a ridge on right side.)
Row 20:  Purl on the right side for 30 stitches, knit 20 stitches, knit 30 stitches. (Makes 2nd ridge on right side)
Row 21- 35:  Knit and purl (stockinette stitch) ending with pearl stitch with 2nd color
Row 36 - 37:  Purl across on right side and then knit across on wrong side.
Rows 38 - 41:  Stockinette stitch
Row 42 - 45:  Repeat rows 11-14, adding pink yarn (or 1st yarn)
Row 46, decrease a stitch (knit two stitches together) every 9th stitch, adding a bead approximately every 6th stitch
Row 47:  Purl across
Row 48:  Knit across, decreasing every 8th stitch
Row 49:  Purl across 
Row 50:  knit across adding a bead on a row between the first beads, and decreasing every 7th row.
Row 51:  Purl across
Row 52:  Knit across decreasing every 5th stitch
Row 53:  Purl across
Row 54:  Knit across adding a bead on a row between the last beads added, and decreasing every 4th stitch.
Row 55:  Purl across
Row 56:  Knit across decreasing every 3rd stitch
Row 57:  Purl across
Row 58:  Knit across decreasing every 2nd stitch.  Cut yarn leaving a long tail.
Using a needle, thread the long tail though the loops on needle and remove from needle;  pull the yarn to gather the stitches, and make a stitch to anchor the stitches.  Stitch down side, matching colors.

If the lamb pin is wanted, cross stitch the lamb on plastic canvas using embroidery thread.  Make a tail using black embroidery thread.  Use black seed beads for the eyes.  There are many patterns for lambs on the web.  I choose not to use one because the teacher in me didn't want to plagiarise on the blog.


When the cross stitching is finished, glue a square of white felt on back.  When dry, cut the unwanted felt away from the lamb.  Glue a pin back on the center of white felt.

Prototype for Emilie Parker Hat
Emilie Parker Hat


     The second hat is in honor of Emilie Parker, age 6. She was described by her father as "bright, creative and very loving."  He said she was always willing to try new things. There is a Facebook account for Emilie and The Emilie Parker Art Connection, which you might want to see.  She so loved drawing and painting.


I took a clue from Emilie and decided to try some crochet stitches that I had never done.  The hat I chose to make in honor of Emilie was described in the Red Heart book More Than Socks! as a ruffled crochet girl's hat.  The booklet with the instructions can be found in a store selling Red Heart yarn or can be ordered on line at Amazon.com.  I was unable to find the suggested yard in a local store;  I ordered it from Amazon.com. 

When making the prototype, I followed the instructions as written, except for one item.  I added a bead to the middle of each lobe in each ruffle.  Instructions for adding beads for crocheting are similar to knitting.  The method for stringing the beads on the yarn first can also be found on You Tube.  But, the crochet hook method can also be used, where two crochet hooks are used.  

The beads on the prototype are also mini pony beads.  In the photo of the prototype, the beads are pink and white.  I used a worsted #4 yarn from the "sewing room" that I cleaned out from my Mother's house.  It made the hat large enough for a teenager.

Using the #4 yarn, a prototype for the hat was done to try the new stitches I had never attempted.  The first stitch was learning to make crochet ribbing.  Then, following the directions, the hat was crocheted using double crochet rows as usual.  When the double crochet rows were completed, the ruffles were then crocheted to the rows of double crochet --new to me.  The stitches are something like an edging pattern. It took me several attempts to find the technique which helped the ruffles lay flat.

After I felt sucessful with the prototype, I ordered the yarn suggested by the pattern.  It was Red Heart Heart & Sole Razzle Dazzle with a #1weight; the #1 weight made a smaller hat. I used orange, brown, green, teal, yellow, and red mini pony beads.  I could find a collection of this color but did find enough from other left-over projects to complete the hat.  They were crocheted in the ruffle exactly as the prototype.

The teenager and child receiving the hats will receive a note asking them to wear the hat in honor of Emilie.

This hat was made in honor of Charlotte Bacon.  She liked everything pink.  This was my first attempt at beading with knitting.  It is so much fun! This hat is basically a rolled rim hat with the welt stitch done three times and two rows of yarn overs to give trhe lacey effect.  Beading has been done between the welt stitch rows to give it a girlie look.  To give it even more a girlie look, ribbon has been laced through holes in the brim yarn overs.


Have almost finished Catherine Hubbard's.  That hat and others will be include in part 3.

Ruffled Crochet Girl's Hat & Scarf

Thursday, April 4, 2013

The Joyner Houses Part 1


The Farmhouse


The first Joyner house was in Greenville, NC.  It belonged to my step-father's father.  My birth father was killed in World War II in July 1944.  My twin brother and I were conceived in April 1944 and were born in january 1945.  So I never knew my birth father.  When my mother remarried in June 1945, she and my new father, my older sister, my twin brother, and I moved from Manchester, New Hampshire to Greenville, NC.  We moved into my new grandfather's farmhouse.  (The farmhouse was not new, but my Granddaddy was new to me.)  Six people lived in the house before we moved in;  we added 5 more, which meant that eleven people were living in the three bedroom house.  The five of us slept in one of the bedrooms.  One thing to remember ... then, only the sitting room was heated.  In the winter, the bedrooms were cold.  The kitchen was heated with the wood stove.  There was never air conditioning, except through the floors, walls, and windows.  Then, the orientation of houses were usually built so that the wind could blow though the house in the summer. The roof was usually a tin roof.  The porch was very important for keeping cool in the summer.

I remember very little when we moved into the farmhouse, but as I became older and we moved out of the farmhouse, I remembered visiting.  Some visions I have about that house have remained.  One was the porch swing.  Rick Bragg wrote a passage The Porch in Southern Living which perfectly describes Granddaddy's front porch.  My brother, Lane, and I spent a lot of time on that porch, evidently.


I don't ever remember the farmhouse being painted.  The house wasn't insulated either (as typical for most farmhouses) and the cracks (or spaces betweeen the floor boards) in the floor were entertainment.  The chickens, dogs, and cats, naturally then, were free roaming and we watched them under the house through the floor boards. Some of the floors, though, were covered with linoleum rugs, but not necessarily the complete floor.  Sometimes the linoleum rugs were smaller than the floor. 

There was no running water in the house for many years, but there was a well hand pump on the back porch.  We loved pumping water when we were a little older; in fact, we got in trouble for emptying the cistern and not replacing water in the prime water bucket. 

The kitchen adjoined the house with a porch separating the living quarters from the kitchen.  I think I remember a big table in the kitchen.  There were also tables on the back porch for washing and cleaning up.

Because there was no running water in the house, there was the outhouse.  Mama had never seen one until she got on the farm and for sure had never used a chamber pot.  She stated she would never use a chamber pot.  Soon after moving into the farmhouse, she had to go one night and refused to use the chamber pot.  She went out the back door in her housecoat and slippers to use the outhouse ;  she slipped on the chicken poop on the steps and fell under the house into more chicken poop.  Everyone expected her to pack her bags to go back to New Hampshire, but she stayed and had to live down that story her entire life.  

The farm had mules and pigs.  One of my uncles who lived in the farmhouse would take me to see the mules and pigs.  I just loved watching the hogs eat and listening to the baby pigs squeal.  Granddaddy had Hog Killing Day in the fall but our mother  never allowed us outside or in the yard while they were harvesting the hogs.  I still remember the smell of the pack house and seeing the meat hanging from the rafters of the pack house.  

While we lived in the farmhouse, Mama and Daddy built a house across the highway on land that Grandaddy gave them.  In 1946, it was the first and only brick house for miles.  Because of that, the family called Daddy the "Governor" and it was later shortened to "The Gov".   Part 2 will tell the story of "The Gov's" house.                   


Sunday, January 13, 2013

Hats in Honor of the Sandy Hook Victims

For the last 3 years, I have knitted hats for the "Coats for the Children" organization.  I usually start in January and make the last one in November.  I stuff them in a large plastic bag and put them in the designated donation box in a bank.

This year I decided to make the hats in honor of the Sandy Hook Victims.  I read the biography of the victim and decide what might meet their personality.  The first hat was in honor of Daniel Barden, age 7.  He liked to make S'Mores around a bonfire with his cousins.


The hat was made by casting on 80 stitches with no. 7 needles.  There is about 1 1/2 inches of ribbing in knit one, purl one.  Then knit 6 rows of stockinette stitch. The next was two welt rows followed by another 6 rows of stockinette stitch.  There are four s'mores using the welt stitch for the crackers (3 rows), the chocolate, (2 rows), and 3 rows for the top cracker. The cracker is 12 stitches across, the chocolate is 12 stitces across, and the marshmallows are 6 stitches across, increased on each stitch. To do the marshmallows, so they seemed puffy, complete four rows of the welt stitch but on the first stitch, increase on each of 6 stitches and then decrease on the last 4th row of the marshmellow.  Inbetween the s'mores is the stockinette stitch of 8 stitches and 14 between each marshmallow.  When the s'mores are finished, the next 6 rows are stockinette stitch, and the next 2 rows are the welt stitch.  After 3 rows of stockinette stitch, begin decreasing, on every knit of the stockinette as follows:
Purl on decreasing rows 2, 4, 6, 8, 10, 12, 14, 16
1st row decreasing, knit 8, knit two together, repeat across
3rd row decreasing, knit 7, knit two together, repeat across
5th row decreasing, knit 6, knit two together, repeat across
7th row decreasing, knit 5, knit two together, repeat across
9th row decreasing, knit 4, knit two together, repeat across
11th row decreasing, knit 3, knit two together, repeat across
13th row decreasing, knit 2, knit two together, repeat across
15th row decreasing, knit 1, knit two together, repeat across
Last decreasing row, knit 2 together across.
Cut yarn using long string of yarn, thread yarn needle on yarn, and pull through remaining stitches.  Pull tight, and stitch the hat together.  Now, there will be many ends that may need to be hidden.  One of the best techniques I found is by Theresa Vinson Stenersen.  Check out her site.

Some of the other hats, but not all, will be used making this basic pattern.  I'll probably also use my looms for making a few.

Thursday, December 13, 2012

The Cat Quilt Gets A Christmas Makeover


In the late 80's, I needed to change the bedroom scene.  I decided to make a calico quilt.  The main element of the quilt was nine appliqued cats on high quality muslin. Before appliqueing, I applied the cats to the muslin using double sided fusible interfacing.  The double sided fusible interfacing  was used to iron the cats to the muslin, holding them in place before appliqueing.  It was especially needed to keep the tails in place. Using the same procedure, bows were then appliqued on the cats.

All work was done on the sewing machine. Teaching and working a couple other jobs did not allow time for handwork.  After finishing the cats, the cat squares were put together with borders.  Then borders were added to make the quilt full/queen size.  A flowered sheet was used for the back of the quilt.   Borders of coordinated calico fabric were sewn to the sheet, making the quilt reversible. Next,  the two sides were combined with polyester quilt batting between, connecting front to back by stitching through both sides of the border seams.  Then green calico was used to make the final border, covering the front edge, the quilt batting, and the back edge.

After years of using the quilt, washing it, and drying it, the quilt began to show wear.  It began to come apart.  Even some of the fabrics began to thin and were tearing.  It was repaired and some of the worn borders were replaced -- but alas, it was difficult to keep up with the repairs.  It was time to let it go!  Tossing it was out of the question so it got put in a closet.

Then, this Christmas, my daughter said that the baby needed a Christmas stocking.  Memories -- she still uses the stocking which was provided by the hospital in 1973.  The Junior League in Sanford, NC made stockings of red and white flannel.  They were made so that a  "Christmas baby" could fit inside them.  The front closed with ribbons and bells, which were attached to the ribbons.  She arrived home in that stocking on Christmas Eve and was the best Christmas present ever!
Ginny, 3 days old,  in her Christmas stocking.  

Ah,  the cat quilt could be used to make Christmas stockings.  After pondering about a week, the research for patterns and instructions began.  A pattern was found, but no instructions for using the quilt.  So, guessing how to do it and guessing what was needed, the materials were gathered.


Materials needed to make the stockings:

  1. The quilt
  2. Fabric for making the cuff and the optional outside pocket
  3. Thread
  4. Interfacing (to give body to the cuff if needed)
  5. Coordinated colored ribbon of choice
  6. Bells (can find them at craft stores)
  7. Toy for pocket (optional)
  8. Jumprings added later to the list (suggested by daughter)


Step 1. I found a basic pattern. The pattern wasn't exactly what I needed so I used it, making revisions.  Notice the brown pattern patterns, with revisions.  Notice the brown pattern with fold.  That was needed so I didn't have to cut up an appliqued cat.  Now the fun begins.

patterns and altered pattterns

pattern adjusted for fold


Step 2. I decided to use a cat for the first stocking.  I cut the cat with the stocking pattern on the fold.  I layed the pattern on a cat, trying to find the best fit.  I was disappointed that the front of the stocking needs to be curved and the cat doesn't seem to fit on the curve without making adjustments to the cat.  That I didn't choose to do.   It was too large to fit on the front. ( I might try it again by using a larger stocking pattern.)  I cut the muslin square with the folded pattern trying to get the pattern as symmetric as possible.  The worse part was over; I finally cut into that quilt! (sob)


Step 3. The next part was to pin the quilt so that the front and back do not come apart.  Then I zigzagged the edges together.  Another reason to do that is that it keeps the inside of the stocking neat. If the stocking should have to be washed, it won't fray or come apart inside, either.  Then, fold the stocking on the fold with right sides together and stitch around the stocking, leaving the top opened.

Folded and stitched
and turned right side out
Pinned

zigzagged

Step 4. The next step is to put the bells on the ribbon.  The first time I did this, I found it very easy to do.  The bells were bells that I bought in the 70's from Ben Franklin, which was on Falls of the Neuse Road in Raleigh.  (It is no longer there.)   Those small bells had large eyes on the top and the ribbon was very easy to pull through and knot.  That is not the case for the new bells I bought.  I had to sew the bells on the knot, which I didn't find as nice.  I checked Michaels, AC Moore, and Joann's and none had small bells in which the ribbon could be pulled through the eye. I tried opening the eyes a little with needle-nosed pliers but the eyes broke.  Drats!  "Time changes everything"-  sometimes good, sometimes not so good.  Then, my daughter told me to try jumprings.  Looked in my jewelry making supplies.  Bingo -- great idea, it works.  Apply the jumpring to the eye of the jingle bell; then, pull and knot the ribbon through the jumpring.  The bells even jingle more using jumprings!

Bells tied to ribbon
Attaching cuff and bells

Step 5. For the cuff or top of the stocking, I used red fabric that I had on-hand.  I used the stocking top pattern, cutting it on the fold, the side where the arrow is on the pattern.  Turn the cuff right side out, and sew the side seam opposite the fold, so that a complete circle is formed.  With right sides facing, pin the cuff to the stocking matching the seams.  Find suitable places for the ribboned bells and pin between the cuff and stocking with ribbon below the pin. (This is important;  otherwise, the bells will be inside the cuff.)

Step 6. Next, before sewing the cuff on the stocking, a loop is needed to hang the stocking.  I like to use the same fabric as the cuff, but ribbon could be used.  Cut a strip double the width you want the loop.  Fold fabric horizontally, pin and stitch.  Turn right side out.  Press the strip with the seam inside or on the outside of the loop.  I like to press the seam on the inside so that the seam isn't seen.  Fold the loop in half and place on the seam of the stocking between the stocking and the cuff.
Loop pinned between stocking
and cuff at seam

Loop pinned


I didn't use interfacing in the stocking cuff, but found that the stocking looks better with it.  When making the next stockings, I will baste interfacing on the cuff before sewing the seam. This should be done at step 5.

Interfacing pinned to
wrong side of cuff
interfacing based on cuff and seam
of cuff is sewn


Step 7.  When I sewing the cuff to the stocking, I have a machine that lets me remove the platform and slip the sewing project into the arm.  It certainly makes the sewing easier.  After sewing the cuff, to the stocking, remove the pins.  I then like to press the cuff on the right side to make it smooth to sew.  Normally, I would trim the seam at this time, but because it is an "abused" quilt, I did not.  At this step, a 1/4 in hem can be made to the cuff that is being sewn to the inside.  Turn the cuff so that half the cuff is outside and half is inside.  Pin the cuff to the inside.

Step 8.  Sewing in the seam, if possible, stitch the cuff on the outside.  Why, the outside and not the inside of the stocking?  If you sew on the inside, the stitches may not be neat on the outside.  Another way to solve that problem, is to baste the cuff inside catching the cuff to the seam, then sew on the outside.  Another way, handstitch the cuff on the inside.  Remember, children may be using the stocking, and hand stitching may not be as sturdy.  Once the inside seam is handstitched, the outside seam of the cuff could be stitched.  This seam stitching, also, reinforces the ribbon and the loop.

Sewing cuff on outside seam


The stocking is now finished and ready to hang.  The pictures show the both sides of the stocking.


There is still more to do because this stocking is not really appropriate for a little boy.  So I start again.
This time I use the pattern as is, and cut the fabric from the border of the quilt.  Notice there is no fold on this pattern so the stocking is stitched entirely around the stocking.


 Making the Pocket

Before stitching, I put a pocket on one side of the stocking.  I pre-shrunk  fabric I found appropriate for a boy, which turned out to be green stripe. I also make the hanging loop green stripe.  This is one way (and not the only way) to sew a pocket on the stocking, giving it room to hold items. Now, I forgot to take pictures of the green stripe pocket, so I made the pocket again, using the red strip -- just in case you are confused.

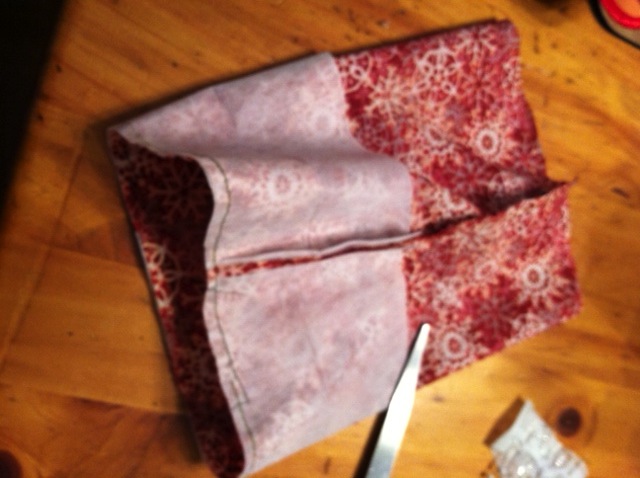
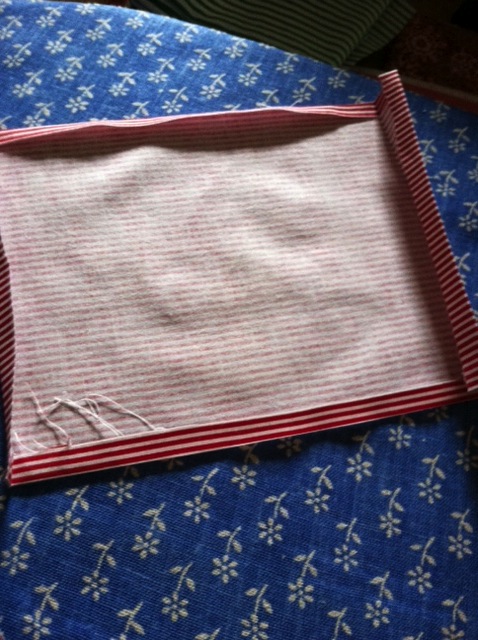
Step 1.  Cut a rectangle out of fabric.  The size should look appropriate on the stocking.  Add about an inch horizontally and vertically to allow for hems and pleats (a).  Make a hem on all sides by pressing 1/4 fabric on all sides (b).
Step 1b
Step 1a


Step 2.  At the top, fold down another 1/2 inch and press.  At the top of the pocket, topstitch across the top of the pocket on the thickest folded edge.
Step 2

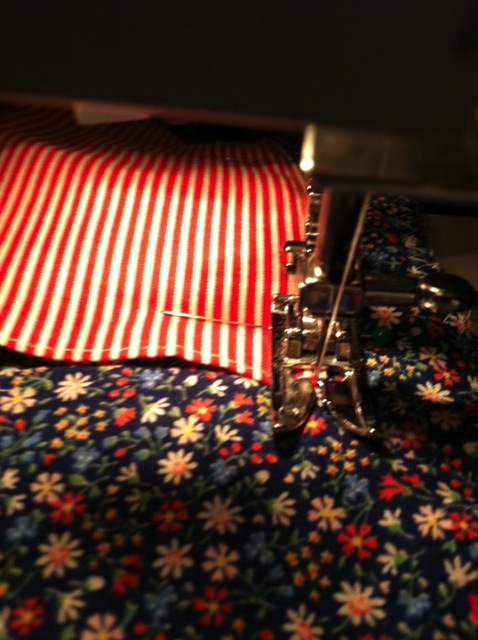
Step 3.  At the bottom and top of the pocket, pin a 1/4 to 1/2-in pleat on each side of the pocket.  The size depends on the size of the pocket and the stocking. Place the pocket on the stocking 
and pin to hold in place (a).  Pin to stocking to create placement of the sides of the pocket (b). (This top pleat will be removed later to give fullness to the top of pocket.) 

Step 3a
Step 3b


Step 4.   Pen the inside of the pleats to the stocking at the four positions so that the pleat can be freed, making sure that the sides of the pocket remain in place (a).  Attach additional pins to keep the sides in place while stitching the sides (b).

Step 4a
Step 4b


Step 5.  At this step, "rectangles" will be sewn as reinforcement at the top corners.  Starting about 1/4-inch opposite the side edge (at the stitching made at the top of the pocket), stitch toward the top fold (a).  At the fold lift the presser bar lever , pivot the pocket, with needle down in the pocket fabric; then, stitch the top fold sewing toward the side edge (b).  Pivot again with the needle in the pocket fabric, and sew the rest of the edge to the bottom of pocket (c).  At the bottom edge, press the reverse button or lever and sew a few stitches to reinforce the stitching (d).  Begin at step 5a, and sew the other side using the same instructions. Do not sew across the bottom of the pocket yet.


Step 5a


Step 5b


Step 5d
Step 5c


Step 6.  In the next step, repin the BOTTOM pleats back in place (a).   Sew the bottom of the pocket, backstitching before and after stitching the bottom of pocket (b).


Step 6a


Step 6b

Lion Stocking


My daughter liked the "Lion Stocking" but she wanted a bigger stocking for my grandson.  (Remember she grew up with that big red and white stocking hanging on the mantel   -- and she can tell you a story about how I filled it.)  The stocking pattern was used.  It was cut down the center vertically and the two sections were taped 3-inches apart.  The pocket was cut wider but not longer.


pattern cut for larger stocking 
bigger stocking side 2

bigger stocking side 1


Gingerbread Man Stocking