Thursday, December 13, 2012

The Cat Quilt Gets A Christmas Makeover


In the late 80's, I needed to change the bedroom scene.  I decided to make a calico quilt.  The main element of the quilt was nine appliqued cats on high quality muslin. Before appliqueing, I applied the cats to the muslin using double sided fusible interfacing.  The double sided fusible interfacing  was used to iron the cats to the muslin, holding them in place before appliqueing.  It was especially needed to keep the tails in place. Using the same procedure, bows were then appliqued on the cats.

All work was done on the sewing machine. Teaching and working a couple other jobs did not allow time for handwork.  After finishing the cats, the cat squares were put together with borders.  Then borders were added to make the quilt full/queen size.  A flowered sheet was used for the back of the quilt.   Borders of coordinated calico fabric were sewn to the sheet, making the quilt reversible. Next,  the two sides were combined with polyester quilt batting between, connecting front to back by stitching through both sides of the border seams.  Then green calico was used to make the final border, covering the front edge, the quilt batting, and the back edge.

After years of using the quilt, washing it, and drying it, the quilt began to show wear.  It began to come apart.  Even some of the fabrics began to thin and were tearing.  It was repaired and some of the worn borders were replaced -- but alas, it was difficult to keep up with the repairs.  It was time to let it go!  Tossing it was out of the question so it got put in a closet.

Then, this Christmas, my daughter said that the baby needed a Christmas stocking.  Memories -- she still uses the stocking which was provided by the hospital in 1973.  The Junior League in Sanford, NC made stockings of red and white flannel.  They were made so that a  "Christmas baby" could fit inside them.  The front closed with ribbons and bells, which were attached to the ribbons.  She arrived home in that stocking on Christmas Eve and was the best Christmas present ever!
Ginny, 3 days old,  in her Christmas stocking.  

Ah,  the cat quilt could be used to make Christmas stockings.  After pondering about a week, the research for patterns and instructions began.  A pattern was found, but no instructions for using the quilt.  So, guessing how to do it and guessing what was needed, the materials were gathered.


Materials needed to make the stockings:

  1. The quilt
  2. Fabric for making the cuff and the optional outside pocket
  3. Thread
  4. Interfacing (to give body to the cuff if needed)
  5. Coordinated colored ribbon of choice
  6. Bells (can find them at craft stores)
  7. Toy for pocket (optional)
  8. Jumprings added later to the list (suggested by daughter)


Step 1. I found a basic pattern. The pattern wasn't exactly what I needed so I used it, making revisions.  Notice the brown pattern patterns, with revisions.  Notice the brown pattern with fold.  That was needed so I didn't have to cut up an appliqued cat.  Now the fun begins.

patterns and altered pattterns

pattern adjusted for fold


Step 2. I decided to use a cat for the first stocking.  I cut the cat with the stocking pattern on the fold.  I layed the pattern on a cat, trying to find the best fit.  I was disappointed that the front of the stocking needs to be curved and the cat doesn't seem to fit on the curve without making adjustments to the cat.  That I didn't choose to do.   It was too large to fit on the front. ( I might try it again by using a larger stocking pattern.)  I cut the muslin square with the folded pattern trying to get the pattern as symmetric as possible.  The worse part was over; I finally cut into that quilt! (sob)


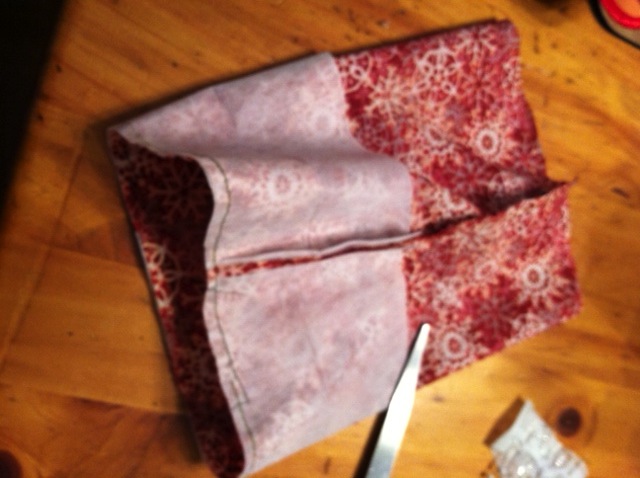
Step 3. The next part was to pin the quilt so that the front and back do not come apart.  Then I zigzagged the edges together.  Another reason to do that is that it keeps the inside of the stocking neat. If the stocking should have to be washed, it won't fray or come apart inside, either.  Then, fold the stocking on the fold with right sides together and stitch around the stocking, leaving the top opened.

Folded and stitched
and turned right side out
Pinned

zigzagged

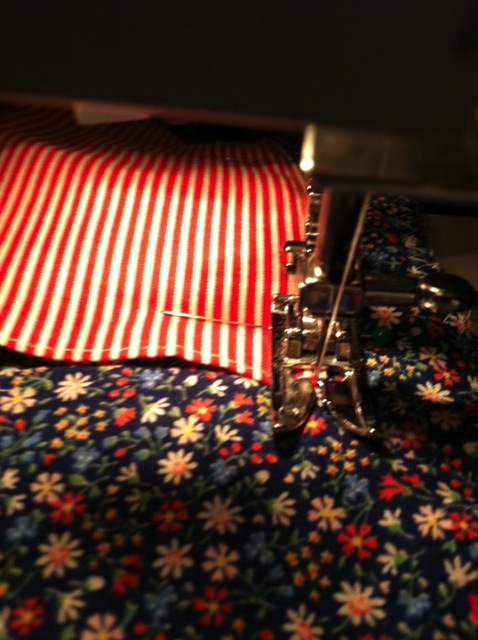
Step 4. The next step is to put the bells on the ribbon.  The first time I did this, I found it very easy to do.  The bells were bells that I bought in the 70's from Ben Franklin, which was on Falls of the Neuse Road in Raleigh.  (It is no longer there.)   Those small bells had large eyes on the top and the ribbon was very easy to pull through and knot.  That is not the case for the new bells I bought.  I had to sew the bells on the knot, which I didn't find as nice.  I checked Michaels, AC Moore, and Joann's and none had small bells in which the ribbon could be pulled through the eye. I tried opening the eyes a little with needle-nosed pliers but the eyes broke.  Drats!  "Time changes everything"-  sometimes good, sometimes not so good.  Then, my daughter told me to try jumprings.  Looked in my jewelry making supplies.  Bingo -- great idea, it works.  Apply the jumpring to the eye of the jingle bell; then, pull and knot the ribbon through the jumpring.  The bells even jingle more using jumprings!

Bells tied to ribbon
Attaching cuff and bells

Step 5. For the cuff or top of the stocking, I used red fabric that I had on-hand.  I used the stocking top pattern, cutting it on the fold, the side where the arrow is on the pattern.  Turn the cuff right side out, and sew the side seam opposite the fold, so that a complete circle is formed.  With right sides facing, pin the cuff to the stocking matching the seams.  Find suitable places for the ribboned bells and pin between the cuff and stocking with ribbon below the pin. (This is important;  otherwise, the bells will be inside the cuff.)

Step 6. Next, before sewing the cuff on the stocking, a loop is needed to hang the stocking.  I like to use the same fabric as the cuff, but ribbon could be used.  Cut a strip double the width you want the loop.  Fold fabric horizontally, pin and stitch.  Turn right side out.  Press the strip with the seam inside or on the outside of the loop.  I like to press the seam on the inside so that the seam isn't seen.  Fold the loop in half and place on the seam of the stocking between the stocking and the cuff.
Loop pinned between stocking
and cuff at seam

Loop pinned


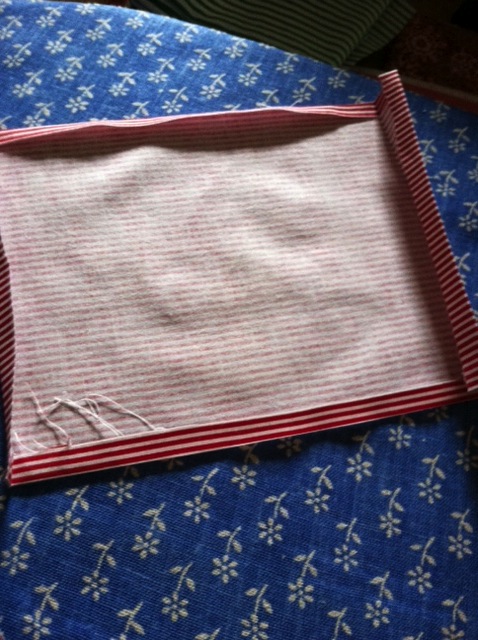
I didn't use interfacing in the stocking cuff, but found that the stocking looks better with it.  When making the next stockings, I will baste interfacing on the cuff before sewing the seam. This should be done at step 5.

Interfacing pinned to
wrong side of cuff
interfacing based on cuff and seam
of cuff is sewn


Step 7.  When I sewing the cuff to the stocking, I have a machine that lets me remove the platform and slip the sewing project into the arm.  It certainly makes the sewing easier.  After sewing the cuff, to the stocking, remove the pins.  I then like to press the cuff on the right side to make it smooth to sew.  Normally, I would trim the seam at this time, but because it is an "abused" quilt, I did not.  At this step, a 1/4 in hem can be made to the cuff that is being sewn to the inside.  Turn the cuff so that half the cuff is outside and half is inside.  Pin the cuff to the inside.

Step 8.  Sewing in the seam, if possible, stitch the cuff on the outside.  Why, the outside and not the inside of the stocking?  If you sew on the inside, the stitches may not be neat on the outside.  Another way to solve that problem, is to baste the cuff inside catching the cuff to the seam, then sew on the outside.  Another way, handstitch the cuff on the inside.  Remember, children may be using the stocking, and hand stitching may not be as sturdy.  Once the inside seam is handstitched, the outside seam of the cuff could be stitched.  This seam stitching, also, reinforces the ribbon and the loop.

Sewing cuff on outside seam


The stocking is now finished and ready to hang.  The pictures show the both sides of the stocking.


There is still more to do because this stocking is not really appropriate for a little boy.  So I start again.
This time I use the pattern as is, and cut the fabric from the border of the quilt.  Notice there is no fold on this pattern so the stocking is stitched entirely around the stocking.


 Making the Pocket

Before stitching, I put a pocket on one side of the stocking.  I pre-shrunk  fabric I found appropriate for a boy, which turned out to be green stripe. I also make the hanging loop green stripe.  This is one way (and not the only way) to sew a pocket on the stocking, giving it room to hold items. Now, I forgot to take pictures of the green stripe pocket, so I made the pocket again, using the red strip -- just in case you are confused.

Step 1.  Cut a rectangle out of fabric.  The size should look appropriate on the stocking.  Add about an inch horizontally and vertically to allow for hems and pleats (a).  Make a hem on all sides by pressing 1/4 fabric on all sides (b).
Step 1b
Step 1a


Step 2.  At the top, fold down another 1/2 inch and press.  At the top of the pocket, topstitch across the top of the pocket on the thickest folded edge.
Step 2

Step 3.  At the bottom and top of the pocket, pin a 1/4 to 1/2-in pleat on each side of the pocket.  The size depends on the size of the pocket and the stocking. Place the pocket on the stocking 
and pin to hold in place (a).  Pin to stocking to create placement of the sides of the pocket (b). (This top pleat will be removed later to give fullness to the top of pocket.) 

Step 3a
Step 3b


Step 4.   Pen the inside of the pleats to the stocking at the four positions so that the pleat can be freed, making sure that the sides of the pocket remain in place (a).  Attach additional pins to keep the sides in place while stitching the sides (b).

Step 4a
Step 4b


Step 5.  At this step, "rectangles" will be sewn as reinforcement at the top corners.  Starting about 1/4-inch opposite the side edge (at the stitching made at the top of the pocket), stitch toward the top fold (a).  At the fold lift the presser bar lever , pivot the pocket, with needle down in the pocket fabric; then, stitch the top fold sewing toward the side edge (b).  Pivot again with the needle in the pocket fabric, and sew the rest of the edge to the bottom of pocket (c).  At the bottom edge, press the reverse button or lever and sew a few stitches to reinforce the stitching (d).  Begin at step 5a, and sew the other side using the same instructions. Do not sew across the bottom of the pocket yet.


Step 5a


Step 5b


Step 5d
Step 5c


Step 6.  In the next step, repin the BOTTOM pleats back in place (a).   Sew the bottom of the pocket, backstitching before and after stitching the bottom of pocket (b).


Step 6a


Step 6b

Lion Stocking


My daughter liked the "Lion Stocking" but she wanted a bigger stocking for my grandson.  (Remember she grew up with that big red and white stocking hanging on the mantel   -- and she can tell you a story about how I filled it.)  The stocking pattern was used.  It was cut down the center vertically and the two sections were taped 3-inches apart.  The pocket was cut wider but not longer.


pattern cut for larger stocking 
bigger stocking side 2

bigger stocking side 1


Gingerbread Man Stocking

Tuesday, September 18, 2012

Getting to That Taggy Blanket


As a grandmother wondering -- Why didn't some of the wonderful thingies exist when I had my children.  One of the things my daughter uses that I like are the Dr. Brown's botttles. (Yes, she breast feeds but she has to supplement with formula and she will being going back to work).  Maybe my son's colic wouldn't have been so bad with Dr Brown's, though we tried almost everything to help eliminate it.

Other things I like are the new cloth all-in-one-diapers with pre-folds or inserts such as BumGenius, Flips, Thirsties, and many others.  I like making the all-in-one-diaper, also.  And, of course, they have developed a home diaper sprayer to clean the poop off the diaper.  Oh, and you can still use diaper pins but there are the wonderful Snappi Diaper Fasteners.

Then there are the wipe warmers with cloth wipes.  When my daughter mentioned this, I thought she had gone too far in this "green movement".  Turns out to be a great idea.  She uses the Prince Lionheart warmer but there are many other brands.  She has a bundle of baby wash cloths which are soaked with a homemade baby wipe solution. The baby wipe solution in the warmer contains a few drops  Lavender essential oil, baby oil, Dr Bronner's liquid castile soap, and water.

 I just love all these new products.

Another thing I just love are the tag blankets.  Yep, I actually knitted two baby blankets, a yellow hooded baby blanket and another banket from Ralvery. The problem is that my grandson may never use the blankets because he was born in the summer.  


Then I learned about tag blankets.

Before my grandson was born, I ordered some fat quarters from Spoonflower.  Had no idea what I was going to do with them.  I saw the prints and knew my daughter would love the patterns and colors.  When she begin talking about tag blankets, I then realized what I wanted to do with the fat quarters.
Tag blankets are wonderful for infants and toddlers.  The tags can help with hand and eye coordination and muscle development.  Toys can be attached to the tags for stimulation and play.

This is how I made my tag blankets.  It is not the only way but I had some thin quilt batting and cotton flannel I need to use up so I machine quilted the tag blankets.  It is made the exact size of the fat quarter which will make the finished blanket approximately 18x18-inches. It can be made larger using other fabrics.  Rather than use flannel, chenille can be used, which will give the blanket more interesting texture.  I am not using it because I am trying use what I have on-hand. To do this I need the following materials.

Materials:

  1. Fat quarter
  2. Quilt batting   (it is the white material pinned to the wrong side of fat quarter)                                          
  3. Cotton flannel (shows as yellow in picture)
  4. Ribbon and rick rack for the tags

Directions:

  1. Pin the quilt batting to the wrong side of the fat quarter as shown in the materials photo.
  2. Pin the tags as shown in the photo to the right side of fat quarter with tag loops laying on fat quarter as shown.

  3. At this point, if you choose, you can baste the tags on the batting and fat quarter
  4. Lay the cotton flannel on the right side of the fat quarter on the tags.  Pin the cotton flannel.  Note in the photo below that there is a batting layer, a fat quarter level, the tags and now the cotton flannel.


  5. With a pencil, mark where the flannel will be stitched to all the layers.
  6. Stitch on the pencil marks, making sure to leave a 4-5-inch gap to turn the blanket right side out.


  7. It is a good idea to stitch the corners again to reinforce them.
  8. Look inside and check seams to make sure there are no white margins if using a fat quarter with white margins.  If all is good, clip corners to remove excess bulk and trim seams.


  9. Turn right side out and carefully push corners out. 
  10. Finger press the sides down and pin.  With machine, top stitch using a slightly long stitch.


  11. Since this blanket is to be quilted,  the same long stitch can be used to outline the "stitches" printed on the fabric.
  12. The beginning and ending of each stitched line was back-stitched to prevent unraveling and threads were clipped.

The taggy blanket is now finished!


Wednesday, September 5, 2012

Physical Properties - Freezing & Melting Points

No technology Setup


Teacher Notes:

Chm.2.1.1 page2image23144 Explain the energetic nature of phase changes.
Chm.2.1.2 Explain heating and cooling curves, heat of fusion, heat of vaporization, heat, melting point, and boiling point).
Chm.2.1.3 Interpret the data presented in phase diagrams. 


In this lab, students will analyze data from graphs made using independent and dependent variables. They will find the relation between the melting point and boiling point of water.

This lab will not include heat of vaporization but can be shown later in this explanation or in another lab.


Helping Students Learn How to Make a Data Table
The data analysis in this lab is a double line graph.  There are no mathmatical calculations in this lab unless you change the lab.

To teach students to make a data table, they must read the lab.  In the first lab, I teach them how to pick out what must be part of the data table.  This probably will not be the first lab.  Some may still need help in making the data table.  If they ask, I ask them what they think are the dependent (controlled)  and independent manipulated) variables.  This would be a good lab in which to discuss variables.  In this lab the variables will be time and temperature.


If a mini lecture on graphing has not been given to the student, the following overhead can be helpful for a quick review. Use the info on an overhead projector or project the information on a smart board.  (Never assume that all students know this information from previous classes. If all do, move on.) Discuss what is included in a well-constructed graph, such as labeled x-axis and y-axis (including units), an appropriate title, neatness and readability.  Students always need to know what is expectedl


This lab will help most students understand that there is a correlation between freezing and melting point.  This lab can be done using technology or no technology.  Both methods will be explained.  Students need help in understanding that there are many experimental errors in this lab but the teacher does not need to state these nor tell the correlation between freezing and melting points.  This needs to be discovered by the student.  The teacher can answer any questions but not tell the expected data to collect.  The students always record data that they truly observe, not what they think they should observe.  The teacher should observe all setups and "might" make recommendations if necessary.

The thermometer should not be used as a stirring instrument.  Remind the students as often as necessary.  Provide plastic spoons for stirring.

Conclusion

In many labs, I added conclusion questions that they might see on a test.  I feel that it makes a connection with what was discussed in class. Also, it can be an aid when studying and reviewing for a test.  Yes, I asked the students to write the questions in the lab book so that they would know what the question was when reviewing for a test.

Experimental Errors
See lab "The Law of Conservation of Energy" to read explanation of experimental errors.

Helping Students To Think       (Important for every Lab)
During a lab, I rarely give additional instructions (beyond the written lab instructions) or give  answers to an experiment, but will answer any questions that will help them.  Yes, it causes frustration, but they learn that I am teaching them how to think.  Sometimes I will answer a question with a question, to again, help them with a thinking process.  I think it is important for students to use a marbled lab book. The Purpose (or Question), Hypothesis, Materials, Procedure and Data Table must be written in the lab book before a student may begin the lab.  (My signature proves that it was done). Every teacher can form their own opinion about this technique but I found that students take more ownership of their lab work.  It also is a good way to organized their lab work.

Technology
In this lab, a temperature probe will replace the thermometer.  This lab can be completed using a CBL or LabPro with a temperature probe and TI calculator.  The computer can be used also if available.  This lab has been completed successfully with all three Vernier products.  Pasco has great science sensors, also. Then, there are probes for classrooms having iPads.  These companies include instructions on the use of the temperature probe, including a temperature lab  such as the CBL temperature lab for Vernier .  Students of all ages love using technology in the science classroom, but in order for it to work smoothly as possible, the teacher needs to have completed the lab with the technology prior to instructing students. It also takes time to set up the technology but becomes easier each time -  well, most of the time. I have found that there will be some students very savvy in the use of the equipment and can help other frustrated students.  Student lab assistants can become helpful with this task also. But again, the teacher needs to know the problems and can help students work through problems encountered during the lab.


Freezing and Melting Points Lab

Question:  What is the freezing point and melting point of water?

Hypothesis:  ?  (Some students will need help.)

Materials: alcohol thermometer, ring stand, utility clamp, test tube, 400-mL beaker, water, 10-mL graduated cylinder, ice, rock salt, plastic spoon, stop watch

Procedure:  

  1. Fill the 400-ml beaker 1/2 full of ice and add enough water to fill the beaker to 3/4 full of ice and water.
  2. Put 5 mol of water into a test tube and use a test tube clamp to fasten the test tube to a ring stand. (Be careful not to break the test tube by clamping too tight too.)  Clamp the test tube above the water bath.  Place the thermometer into the water inside the test tube. Record the temperature.
  3. When the equipment is ready, lower the test tube into the ice-water bath.  Begin the stop watch and record the temperature of the thermometer every 30 seconds for 15 minutes.
  4. As soon as the test tube is lowered into the beaker, add 5 spoons of salt to the beaker and stir with a plastic spoon.  Do not use the thermometer to stir!  
  5. Add more ice to the ice-water bath as the ice in the beaker begins to melt. Remember to keep recording the temperature every 30 seconds.
  6. When 15 minutes have passed, stop collecting data but keep the test tube submered in the ice-water bath.  Using the data collected, determine the freezing temperature of the water in the test tube.
  7. Begin a new data list.  Raise the test tube and clamp it above the ice-water bath.  Do not move the thermometer.
  8. Remove the ice water from under the test tube.  Start stop watch and begin collecting temperature data every 30 seconds.  Pour the ice-water in a disposal bucket provided by your teacher.  Rinse the beaker and put 250 mL warm water in the beaker.  When 12 minutes have passed, lower the test tube and thermometer into the warm-water bath.
  9. When 15 minutes have passed, stop collecting temperature and time data. Using the data collected during the melting, determine the melting temperature of the water in the test tube.
  10. Graph the data with time as the independent variable and temperature as the dependent variable.  Graph the temperatures in the first 15 minutes and the second 15 minutes on the same x and y axes(total of 30 minutes).  The difference in the two line graphs can be supported with a line and broken line, or different colors.  Label where phase changes occur and the heat of fusion. Be sure to make a key for your graph.

Data Table:  (Includes the dependent and independent variables)

Data Analysis:  (This would include the graph on graph paper)

Conclusion:  

Questions:  Write the question and answer in complete questions.
  1. What does phase change mean ans where do they occur in this lab.
  2. What is the dependent variable and independent variable in this experiment?
  3. Describe what happens to the water temperature as it freezes.  Describe  what happens to the water temperature as it melts.  
  4. Why are there flat lines on the graph?
  5. Using the data from the graph, what was the freezing temperature of the water? What was the melting temperature of the water?
  6.  Using the independent and dependent variables, describe the relation between the melting point and boiling point of water.
Remember that there has to be a paragraph about the experimental errors and what changes would be made if the lab was repeated.